

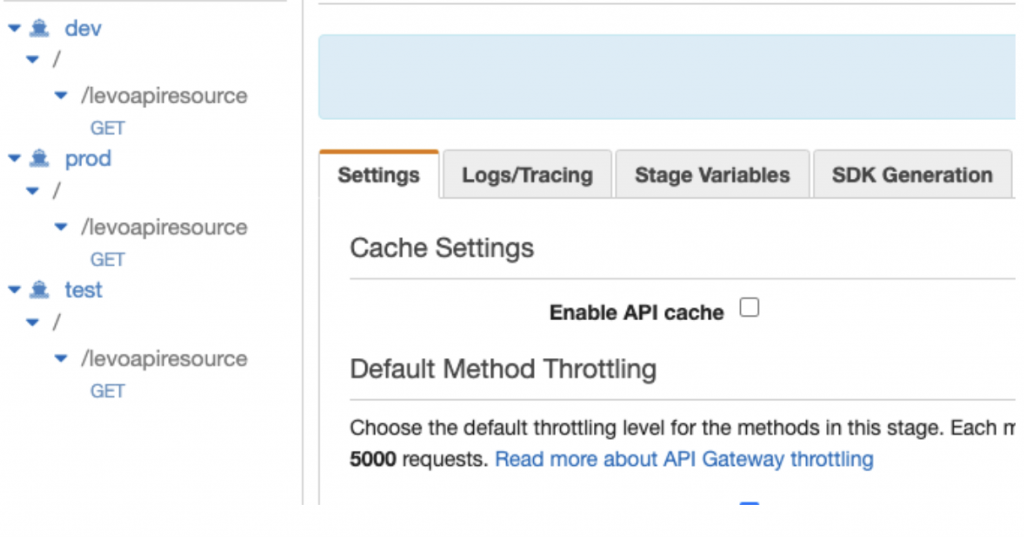
2. Navigate to the Stages tab under Resources in the left sidebar. Depending on your application lifecycle, you may have multiple stages. Choose the stage you would like to export the schema and test (dev, test, prod, etc.).
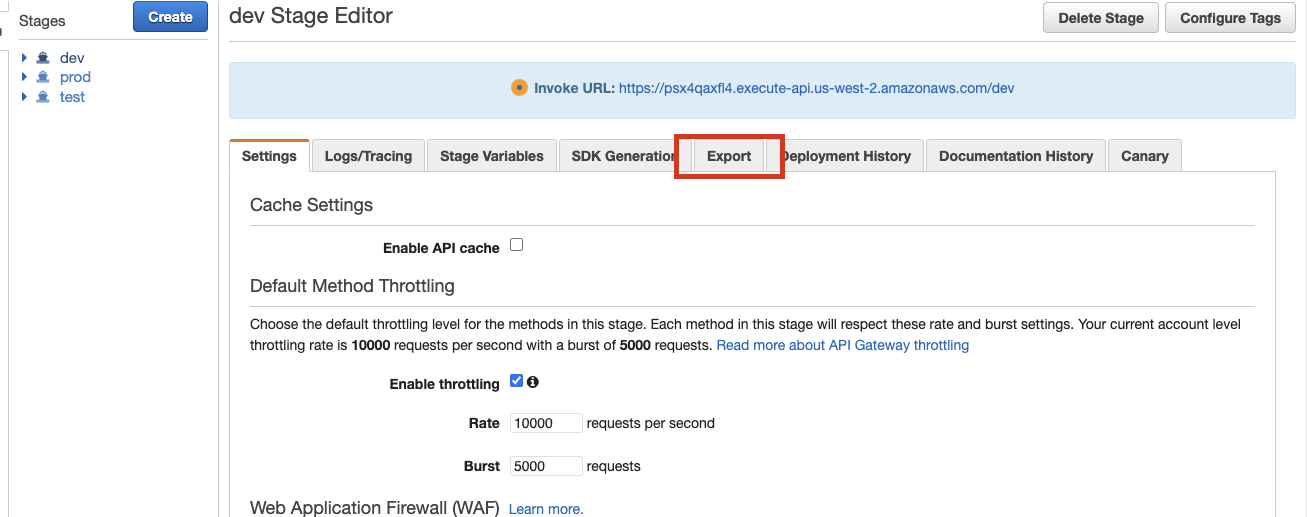
3. Your invoke URL should appear along with several other tabs underneath it. Navigate to the Export tab on this page.
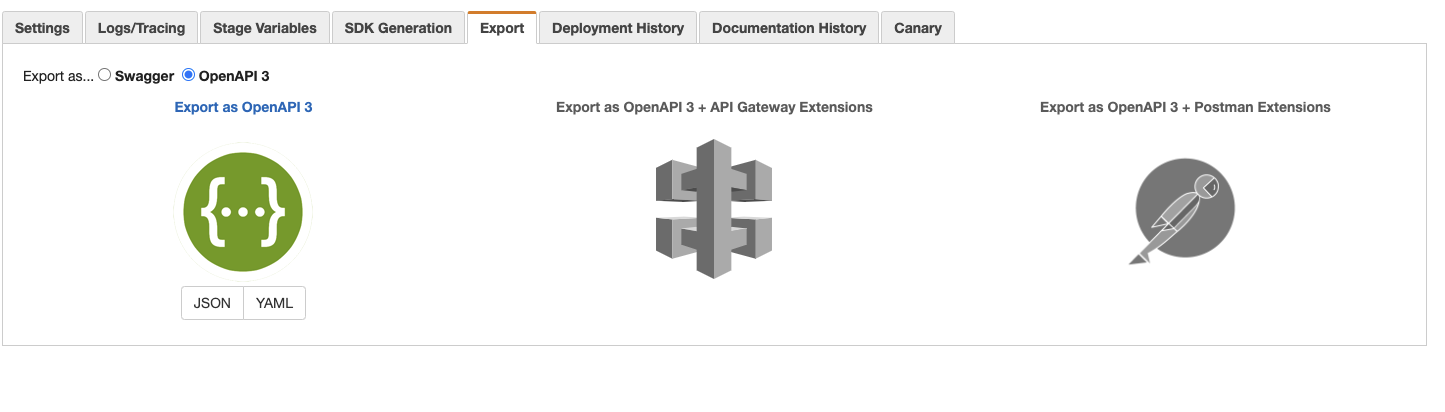
4. In the export tab, you can choose to export as OpenAPI3 Specification and export the schema in either JSON or YAML format. Save the file it creates to your local desktop.
HTTP API:
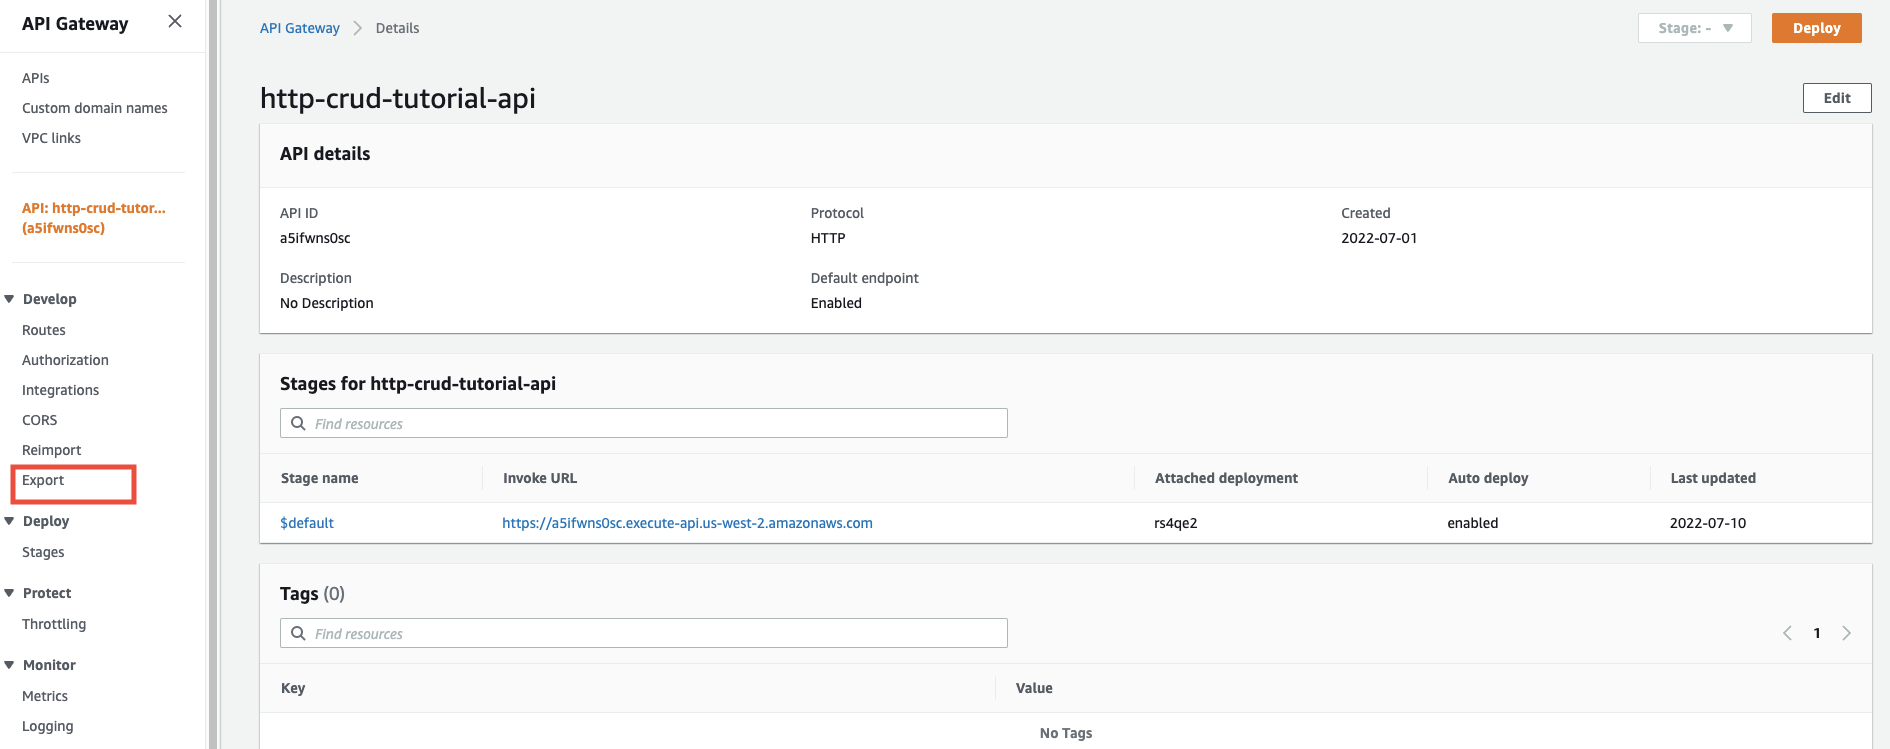
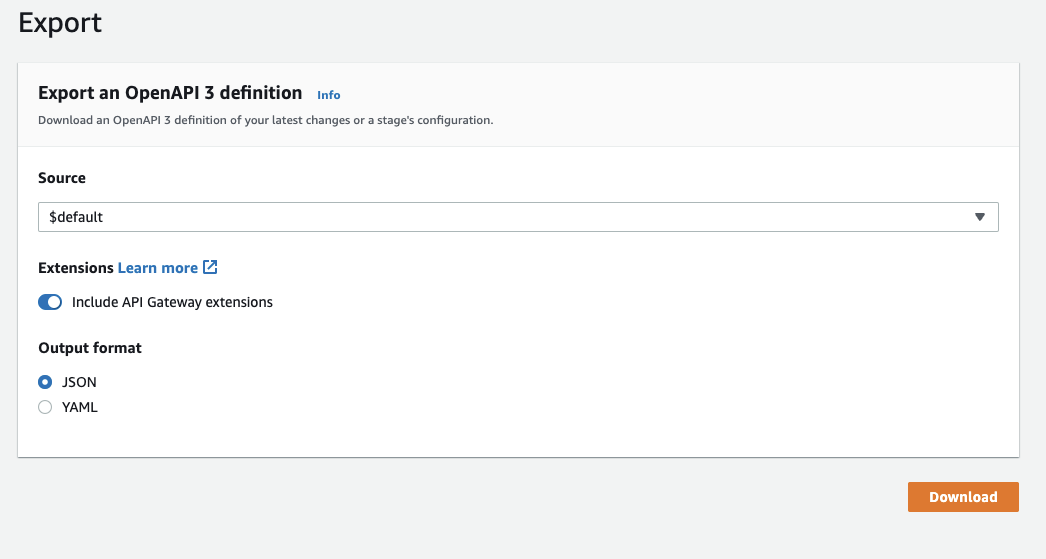
5. If you are working with an HTTP API, your dashboard will have an Export option on the left sidebar. Click on “Export.”
6. HTTP APIs, by default, only supports exporting with OpenAPI3 Definition. Choose the source based on which stage you would like to export. Then choose the output format JSON or YAML. Finally, click download to download the schema to your local desktop.
Step 2- Import the API Schema into Levo
In this step, we will walk you through how to import the exported JSON file into the Levo test harness. Set up a Levo account if you do not have an account.
7. Navigate to Levo.ai and log into your account. In your account, go to the API Catalog tab and click the “Import New Schema” button in the top right corner.

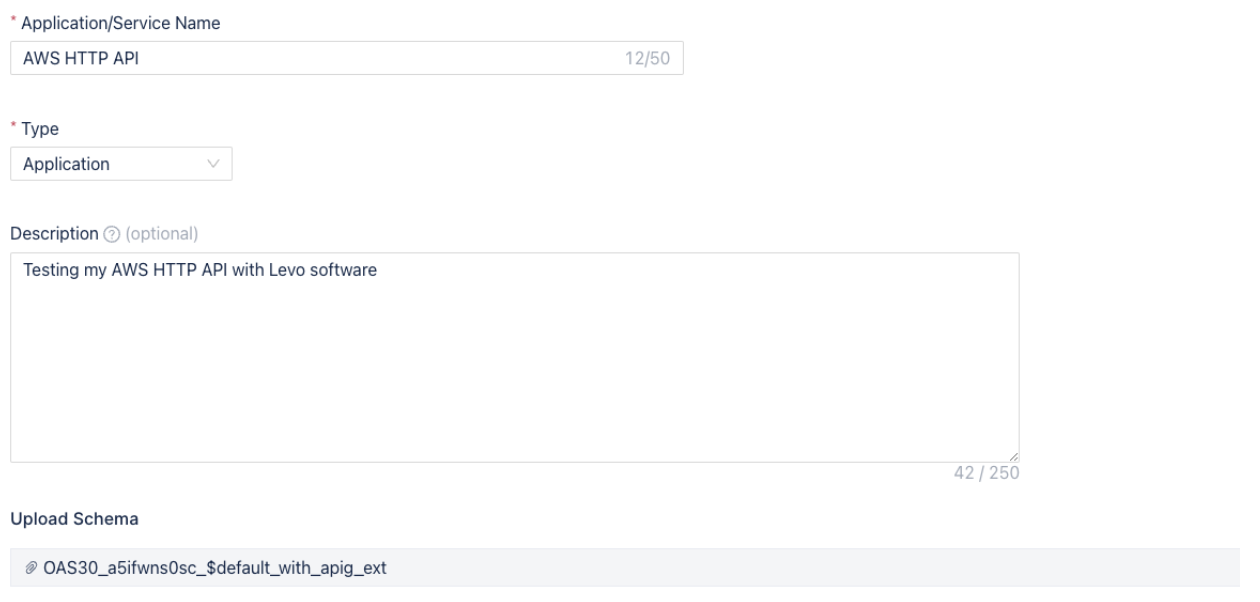
8. Create the name for your application/service, select whether it is an Application or Service, provide a description if you’d like, and upload the schema file. You may add metadata to conduct authorization tests or other advanced tests. Finally, click save in the bottom right corner.
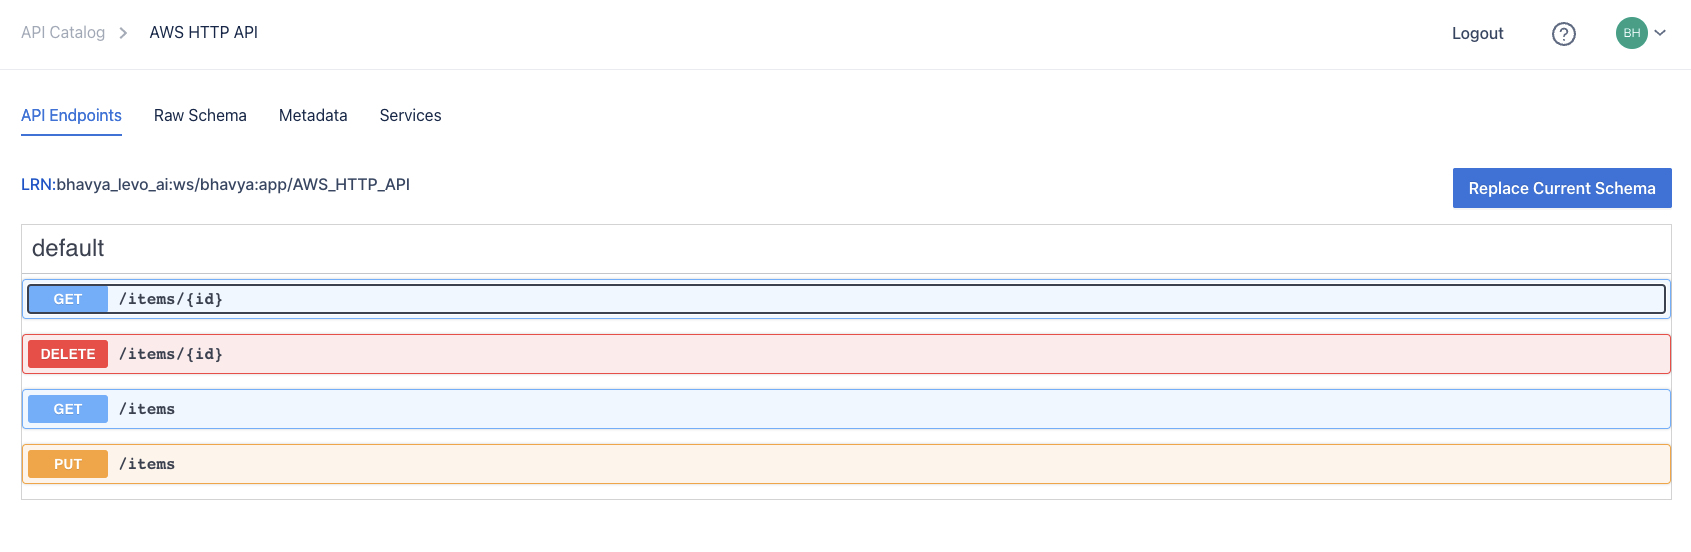
9. After your upload has been saved, you will be directed to the API catalog page showing your API endpoint details. You can then browse through your API endpoints and methods.
10. Next, go to the Test Plan tab on the left sidebar of your Levo account. Click the “New Test Plan” button on the right side to create a new test plan.

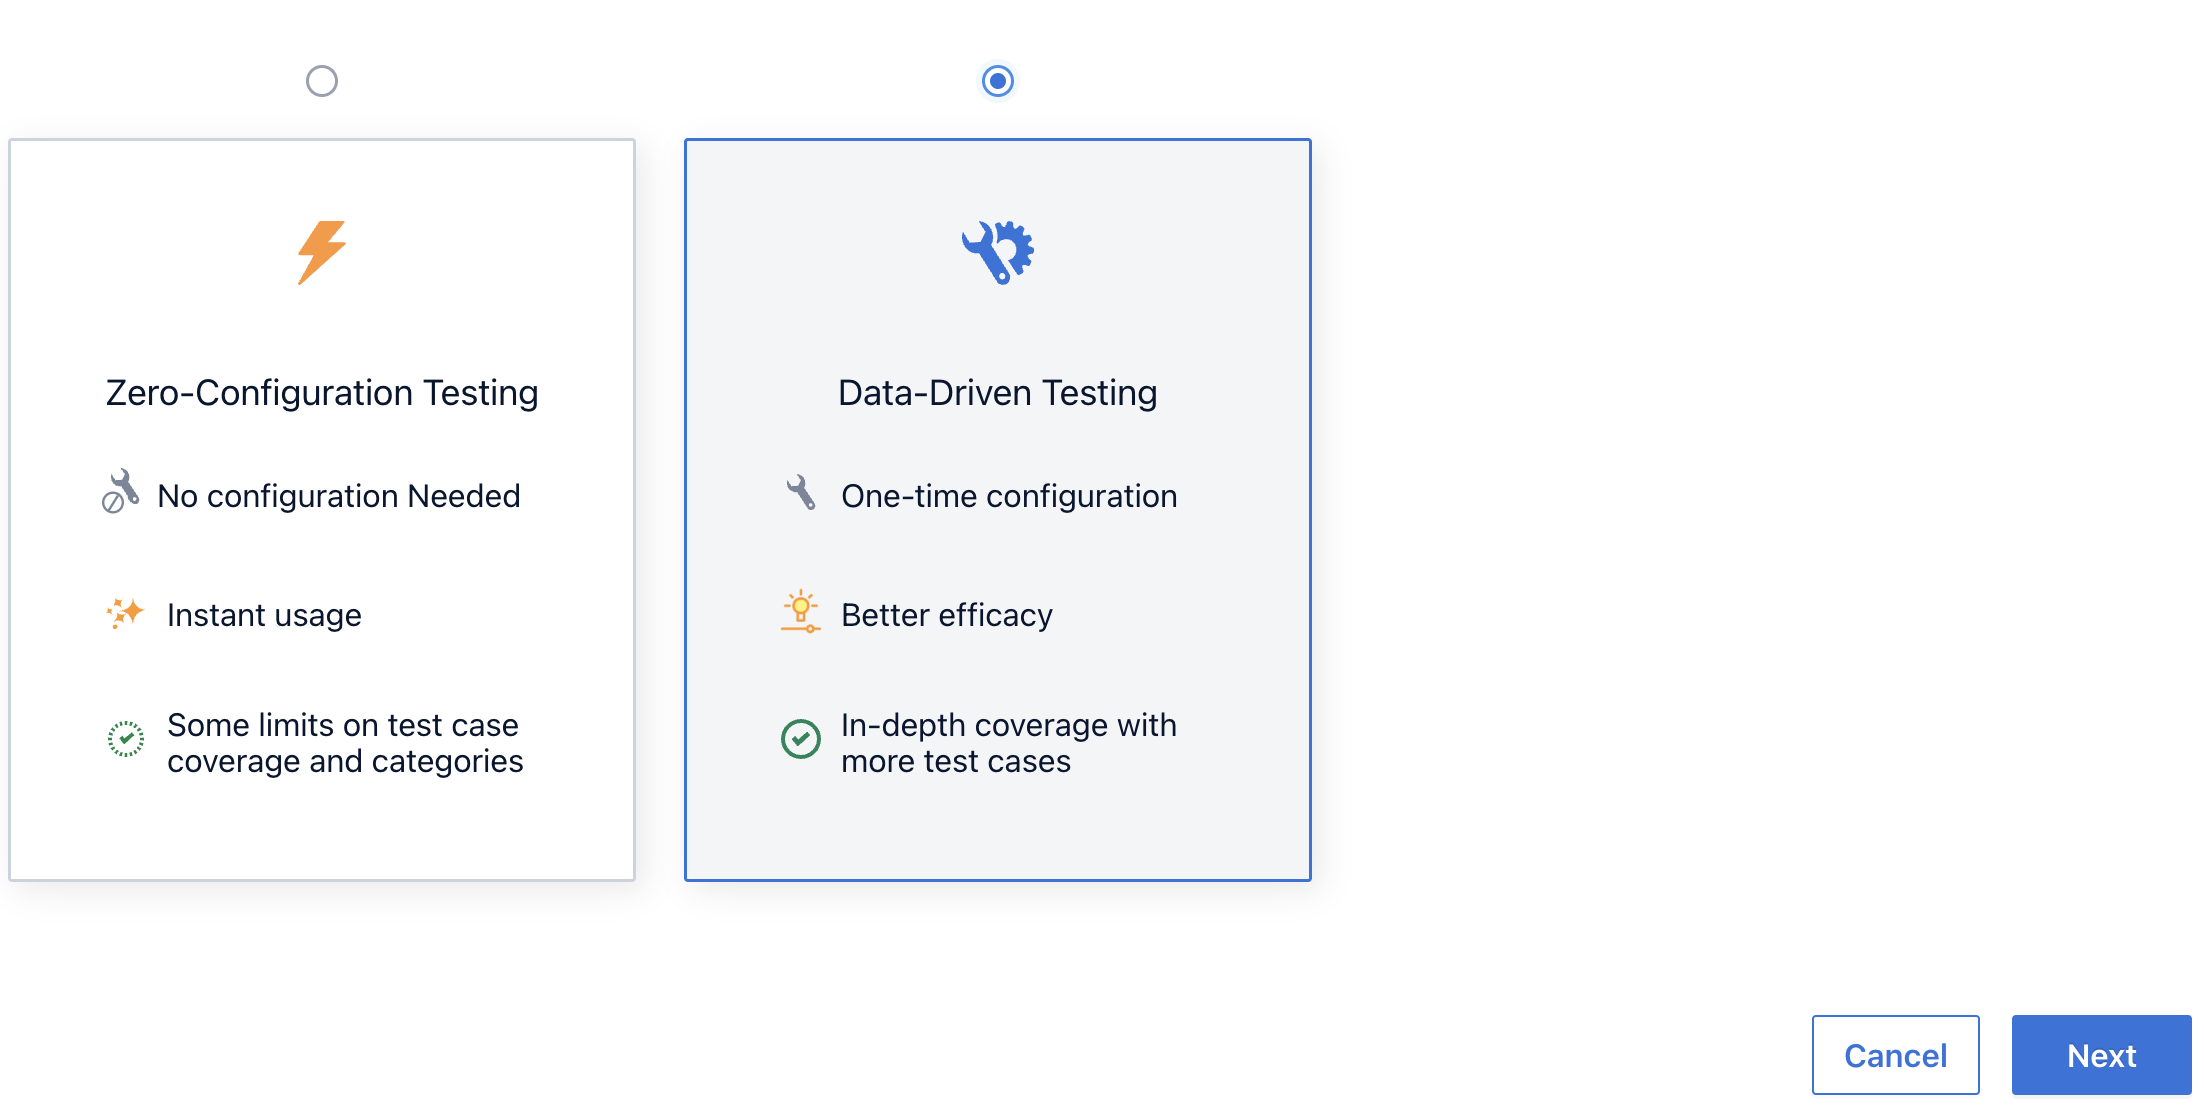
11. Choose the type of test plan you want to use. I will be continuing with a Data-Driven Testing plan. If you’re unsure which test plan to use, refer to Test Plan Documentation.
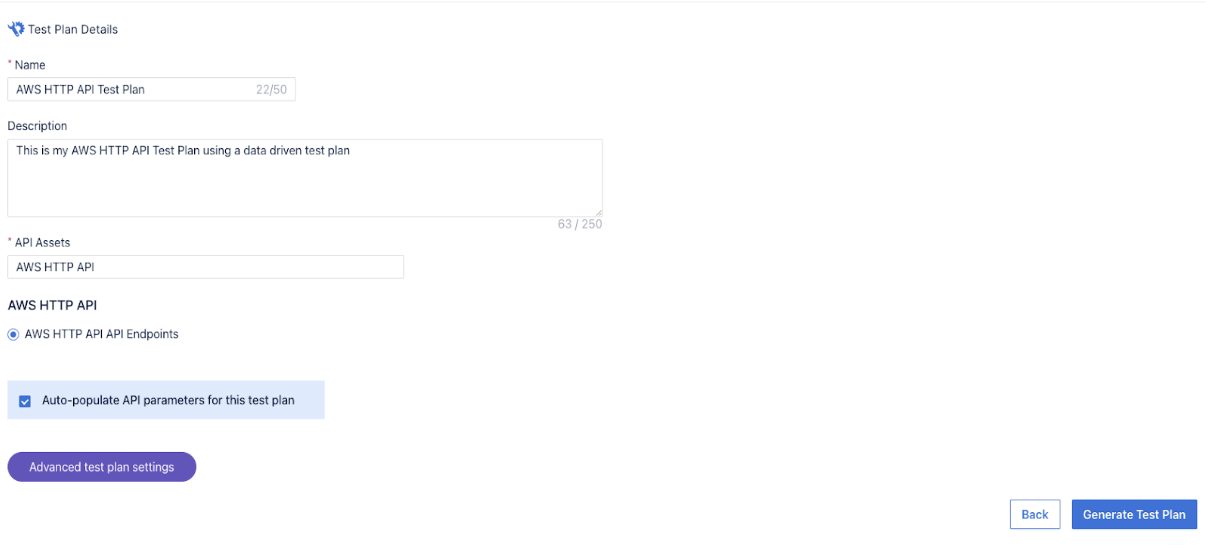
12. Name your test plan, add a description, and select the API Asset. Your API asset name will be what you saved in the API Catalog when you uploaded your schema. I am also choosing to auto-populate API parameters with my test plan. This is optional; by configuring parameter data, end users can control what data is sent when making API calls. To learn more about parameter data and test fixtures, refer to this link. Finally, click on the “Generate Test Plan.”
Step 3 – Execute your Test Plan using Levo CLI
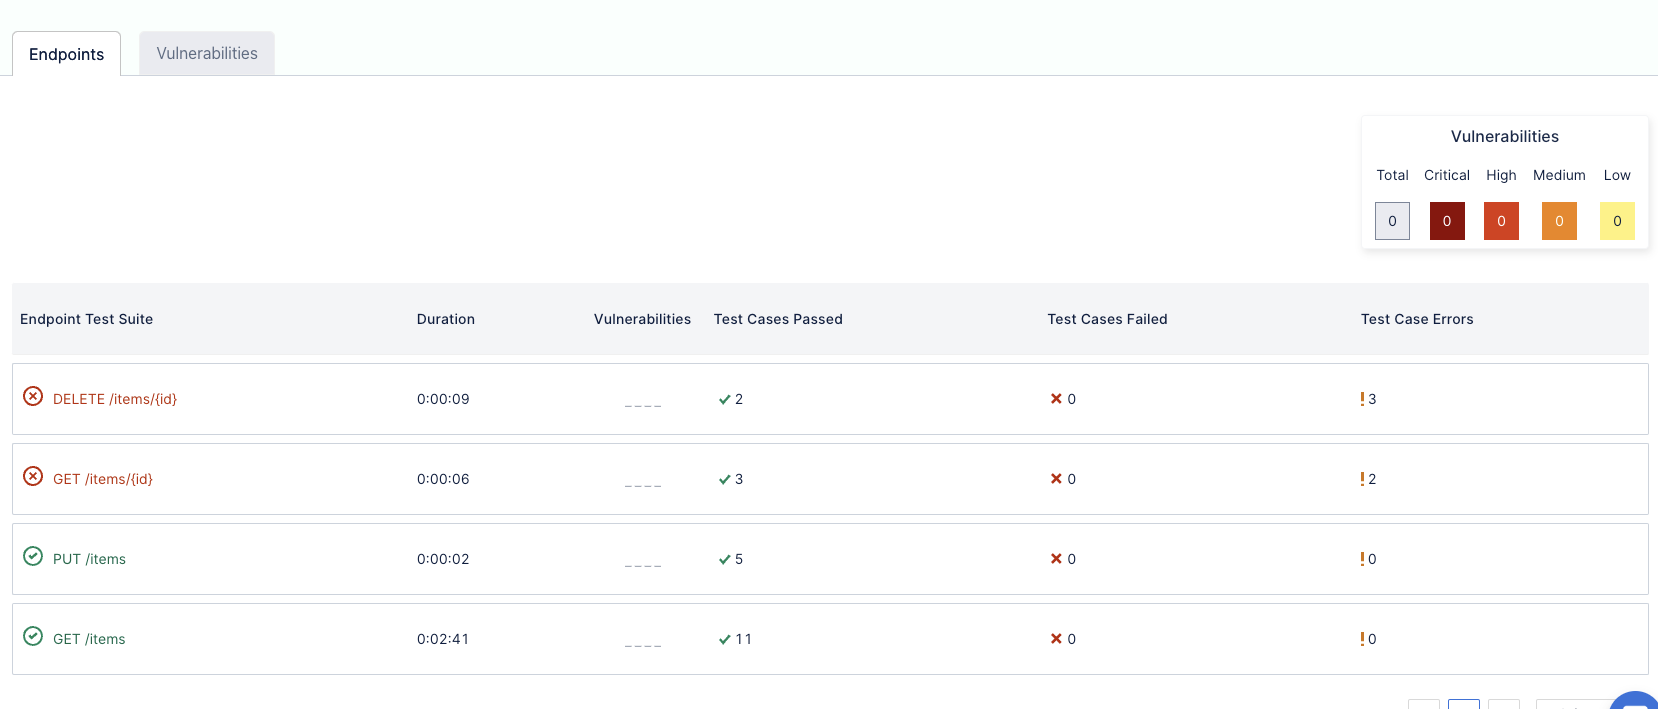
In this step, we will use command line tools to launch Levo docker containers and Execute Test Plan. Follow the instructions here to install Levo CLI and authenticate it with Levo SaaS. Levo CLI is the test runner that will execute the test plan against your running instance of crAPI. You can log back into the console to view your API Test results and drill down to identify security vulnerabilities and contract non-conformance.
Levo is the only purpose-built security solution for APIs & microservices that provides comprehensive detection of both business logic and OWASP Top 10 vulnerabilities. Levo supports all popular CI/CD environments.
Continue testing your APIs referring to the Levo Docs to explore all of our available features. If you have more questions about exporting HTTP APIs or REST APIs from the AWS API Gateway, please contact info@levo.ai.
Best,
Bhavya Garlapati
Cyber Security Intern


